


Step 2.B) Choose a Web Hosting Plan
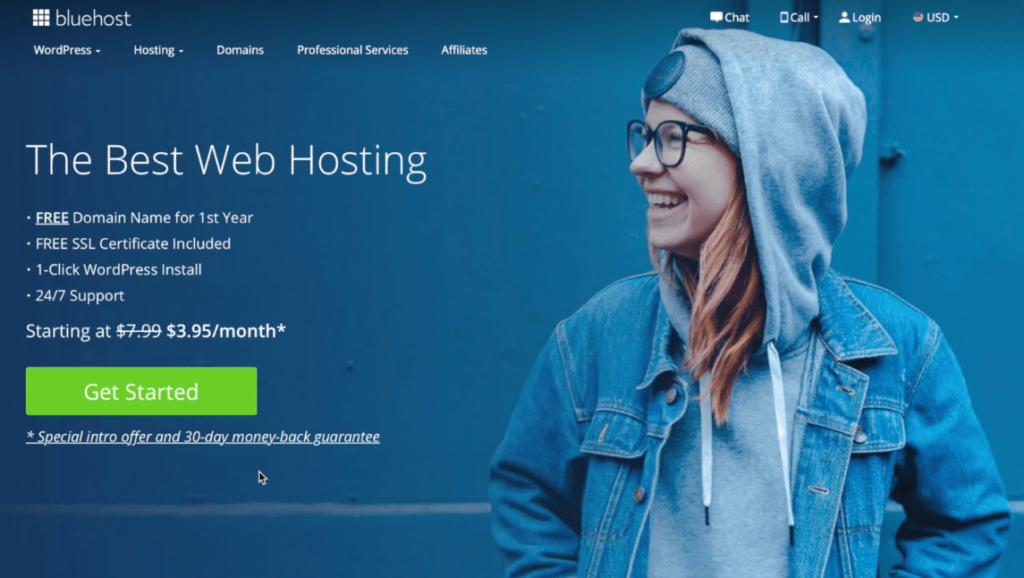
Click on the “Get Started” button and you’ll be taken to a pricing page where you will need to choose a plan for your website. If you’re only planning to have one website, I would suggest going with the “Basic plan” of $3.95. This is the most affordable plan online today!
The “Plus”, “Choice Plus” and “Pro” plans are good if you plan on having multiple websites, but to start, just stick with the basics.

Also, BlueHost can do free migrations if you aren’t happy with your current host or looking for a change.
Step 2.C) Choose a Domain name
Once you choose the plan, on the next screen, you’ll be asked to select a new domain name or add a domain you already own if that is the case. Take your time to think in a domain name because you can’t change it later. If you already have a business you can use the same name like yourbusiness.com.
If your name is taken, try a combination of words or letters that differentiates yours from the other. But, don’t overcomplicate it because the goal is to have something easy to remember for your visitors, clients, customers, etc.
Domains that end in .org and .net are okay but a .com adds a sense of legitimacy to your website that can’t be matched. There is also .biz, .tech, .tv, and plenty more but I don’t recommend these unless you’re desperate.
But, you don’t need to choose one right away. You can click the link to create it later and continue with the guide and select your domain later on!
Step 2.D) Fill in Your Personal and Payment Details
Once you have done all that, you will be asked to fill in your personal details. Your receipt will be sent to the email address you enter in this section, so make sure it’s correct. In the next section you can choose an account plan for one to three years, that depends on you for how long you want to have it. Just take in mind that the longer the plan you get the lower is the price.
Then you will be asked to get some extra features, I normally uncheck them all because you can use free plugins to replace those features. Finally, all you have to do is add in your credit card details (or use PayPal), whichever is easiest for you, then check the standard Privacy Policy and Terms of Service, and hit the green submit button!

Once you see your purchase was a succeed, go ahead check your receipt to see your info is correct and click on Create Account.

Then you just have to create your account and password before beginning with anything else. Make sure to create a secure password!

Then click on Login.

It will direct you to the Bluehost login dashboard and you just have to fill in your details.

So that’s quite simple, right? Just follow the instructions and you’re good to go on your way to making a professional website.
After login, the next step is very easy with a few clicks of a button to get started. BlueHost will install WordPress for you!
In this section, you have to name your site, usually the same name as your domain and set up a tagline that is basically what is your site about in a short description.
Then, if you want a blog or an online store select whatever you want, this just going to set up some extra features depending on what you choose.
But, as we are doing a website and not an online store, then choose Blog > Display Blog Post On A Different Page.

After, you have to check the boxes that correspond more to your goals.

This will direct you to select a theme for your WordPress Site. Don’t worry if you regret your choice, you can change it later.

Once you have done that, it’s all done! You will be taken to the Bluehost dashboard, you can see that there are two buttons.

Launch My Site is to make you site public to the world, you can either do it right now or wait until your website is ready with all your content, design, media, etc.
If you want to start crafting your website click on the WordPress button and you will be direct to the WordPress dashboard.
Something I like about BlueHost is the automatic WordPress install. Other hosting providers make you install it yourself and it can be time-consuming and confusing.